Don't have time to read this now, pin it for later!
This blog post includes affiliate links. What does this mean? It means you will pay no more but I will get a commission for the referral.
Hello Friends! Are you ready to make some adorable Photo Frame Snow Globe Christmas ornaments? This post will tell you everything you need to know to make these to give as gifts for Christmas.
The things you need for this project are:
Or if you have a laser cutter:

1. First, start out by gathering all your supplies.
If you are cutting the design on the laser, use the Adhesive tape on one side of the front wood piece (farthest left in the photo), on one side of the globe base (small rectangle shape) and on one side of the back piece (with the screw holes.) You will not put any adhesive tape on the middle wooden piece.
Suggested Cut Settings:
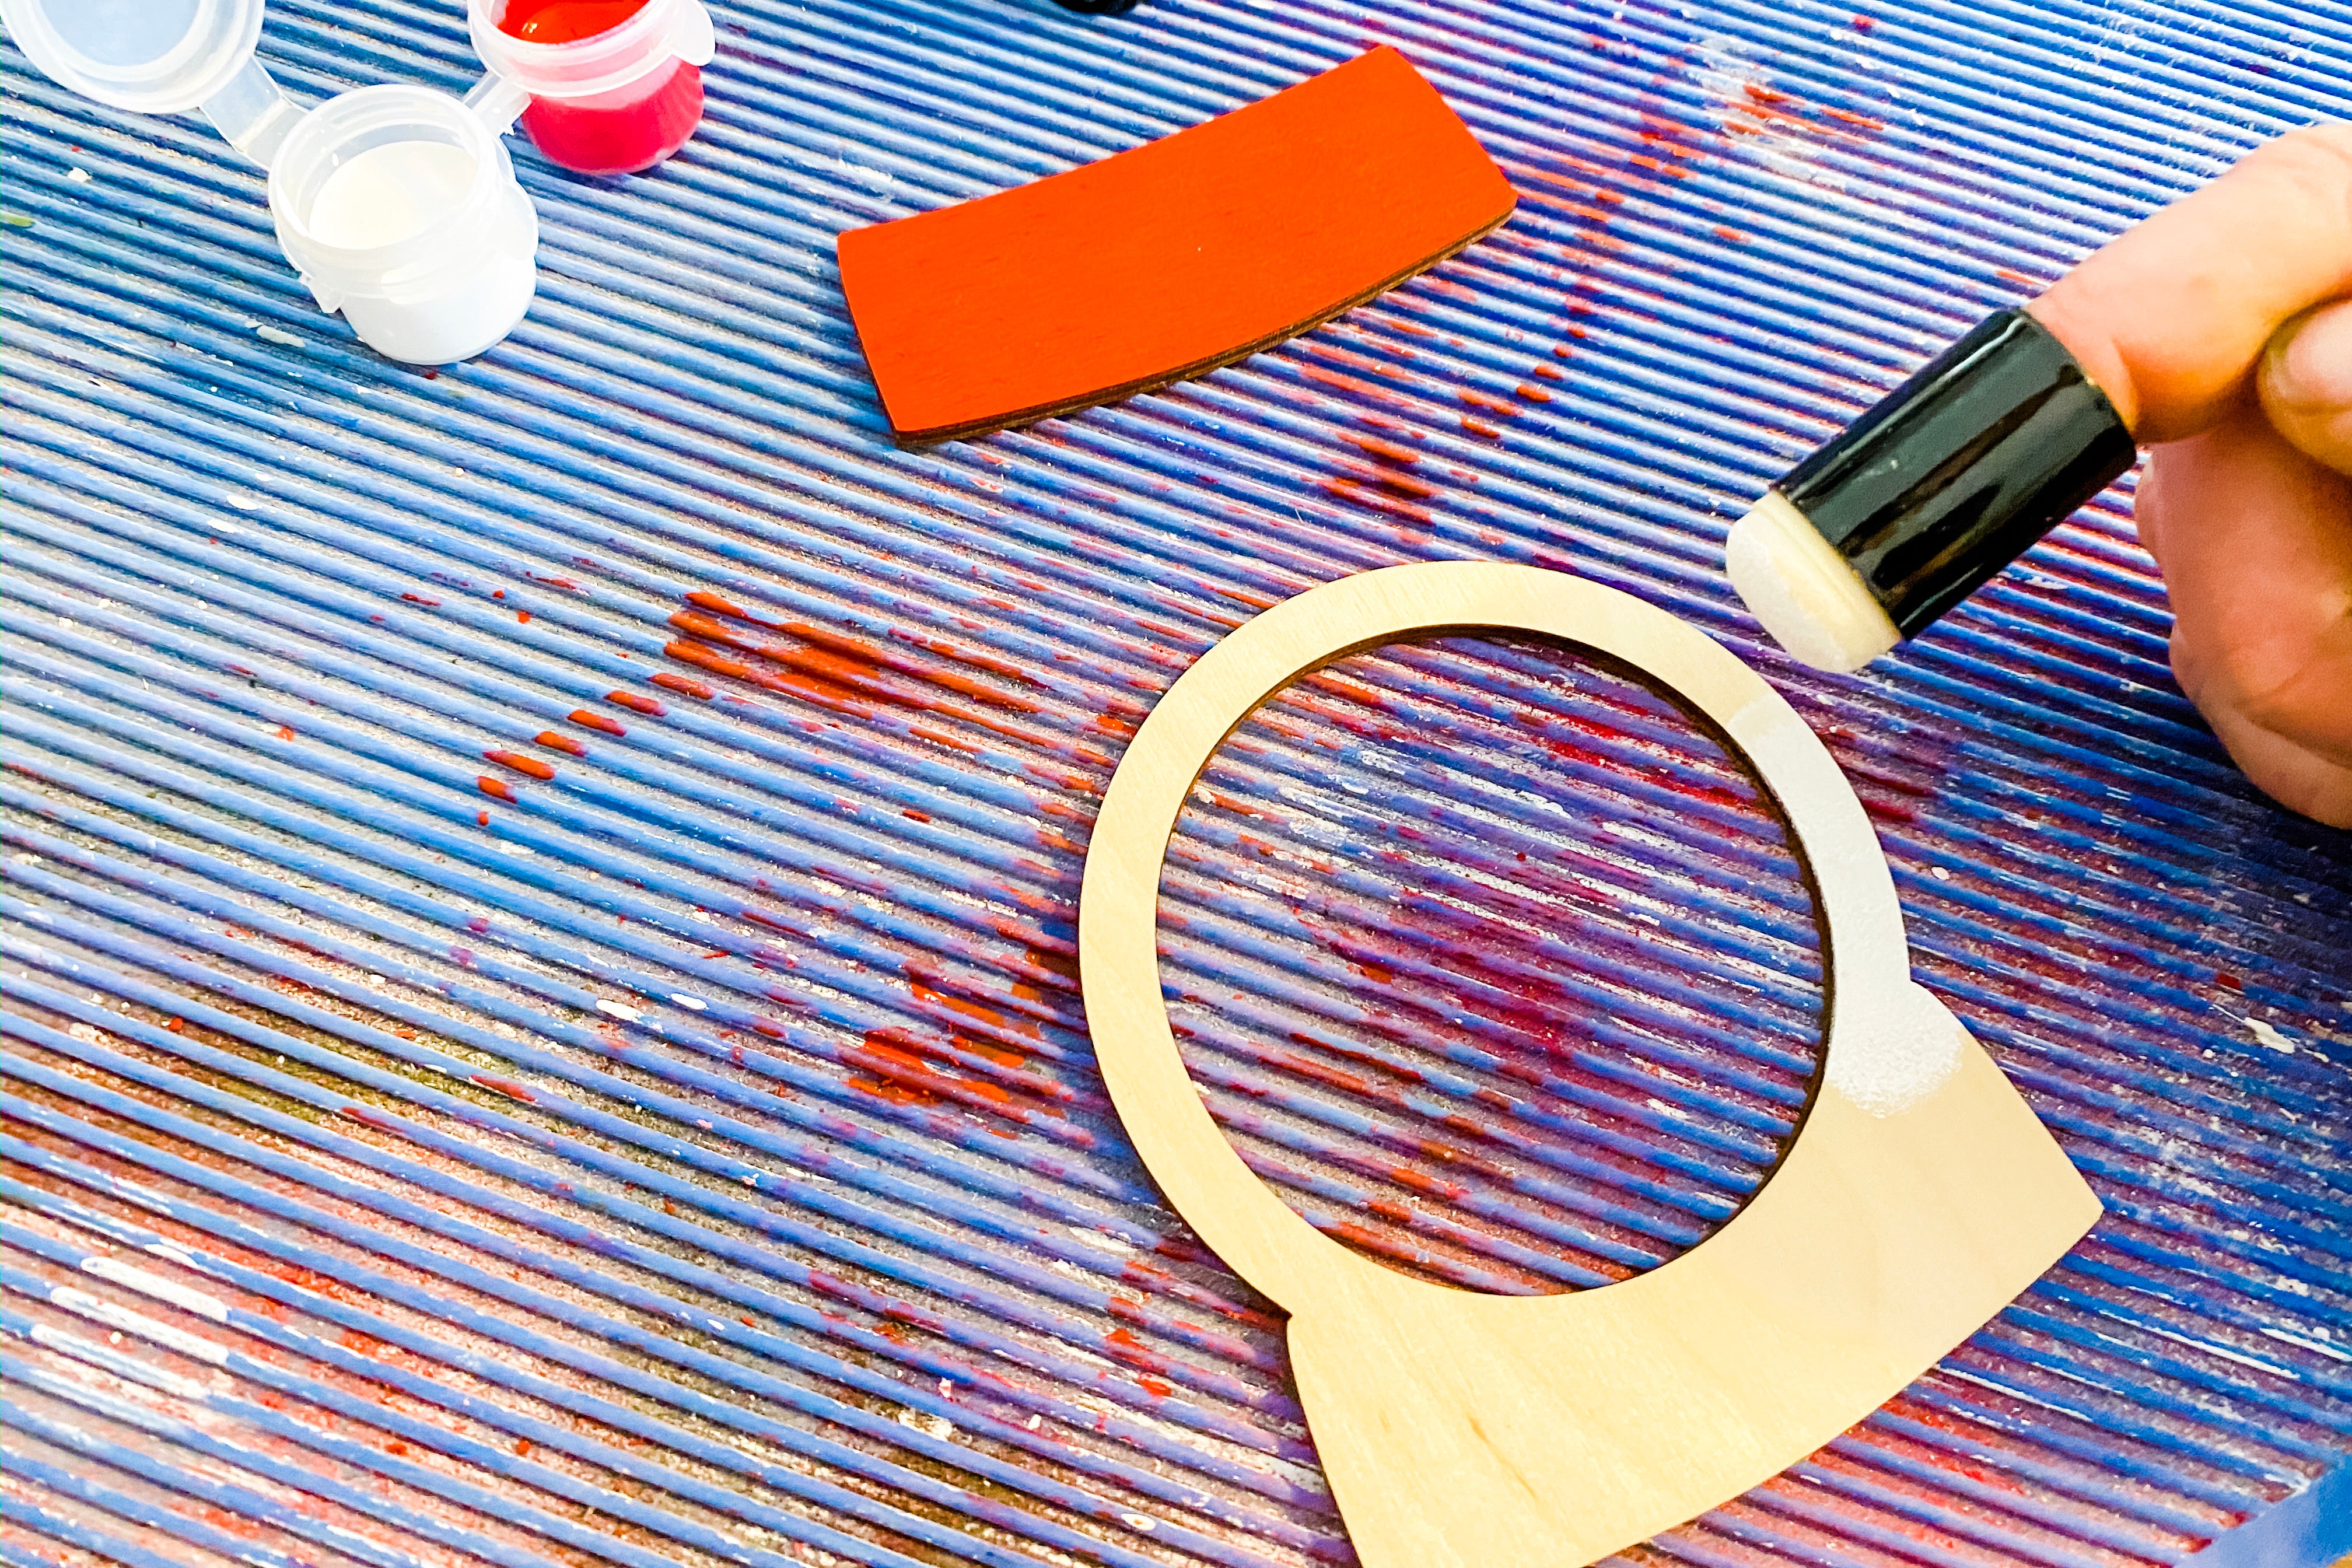
2. First you will paint the pieces. I only painted the globe base and the circle around the opening on the front of the frame. The rest I left the natural wood.
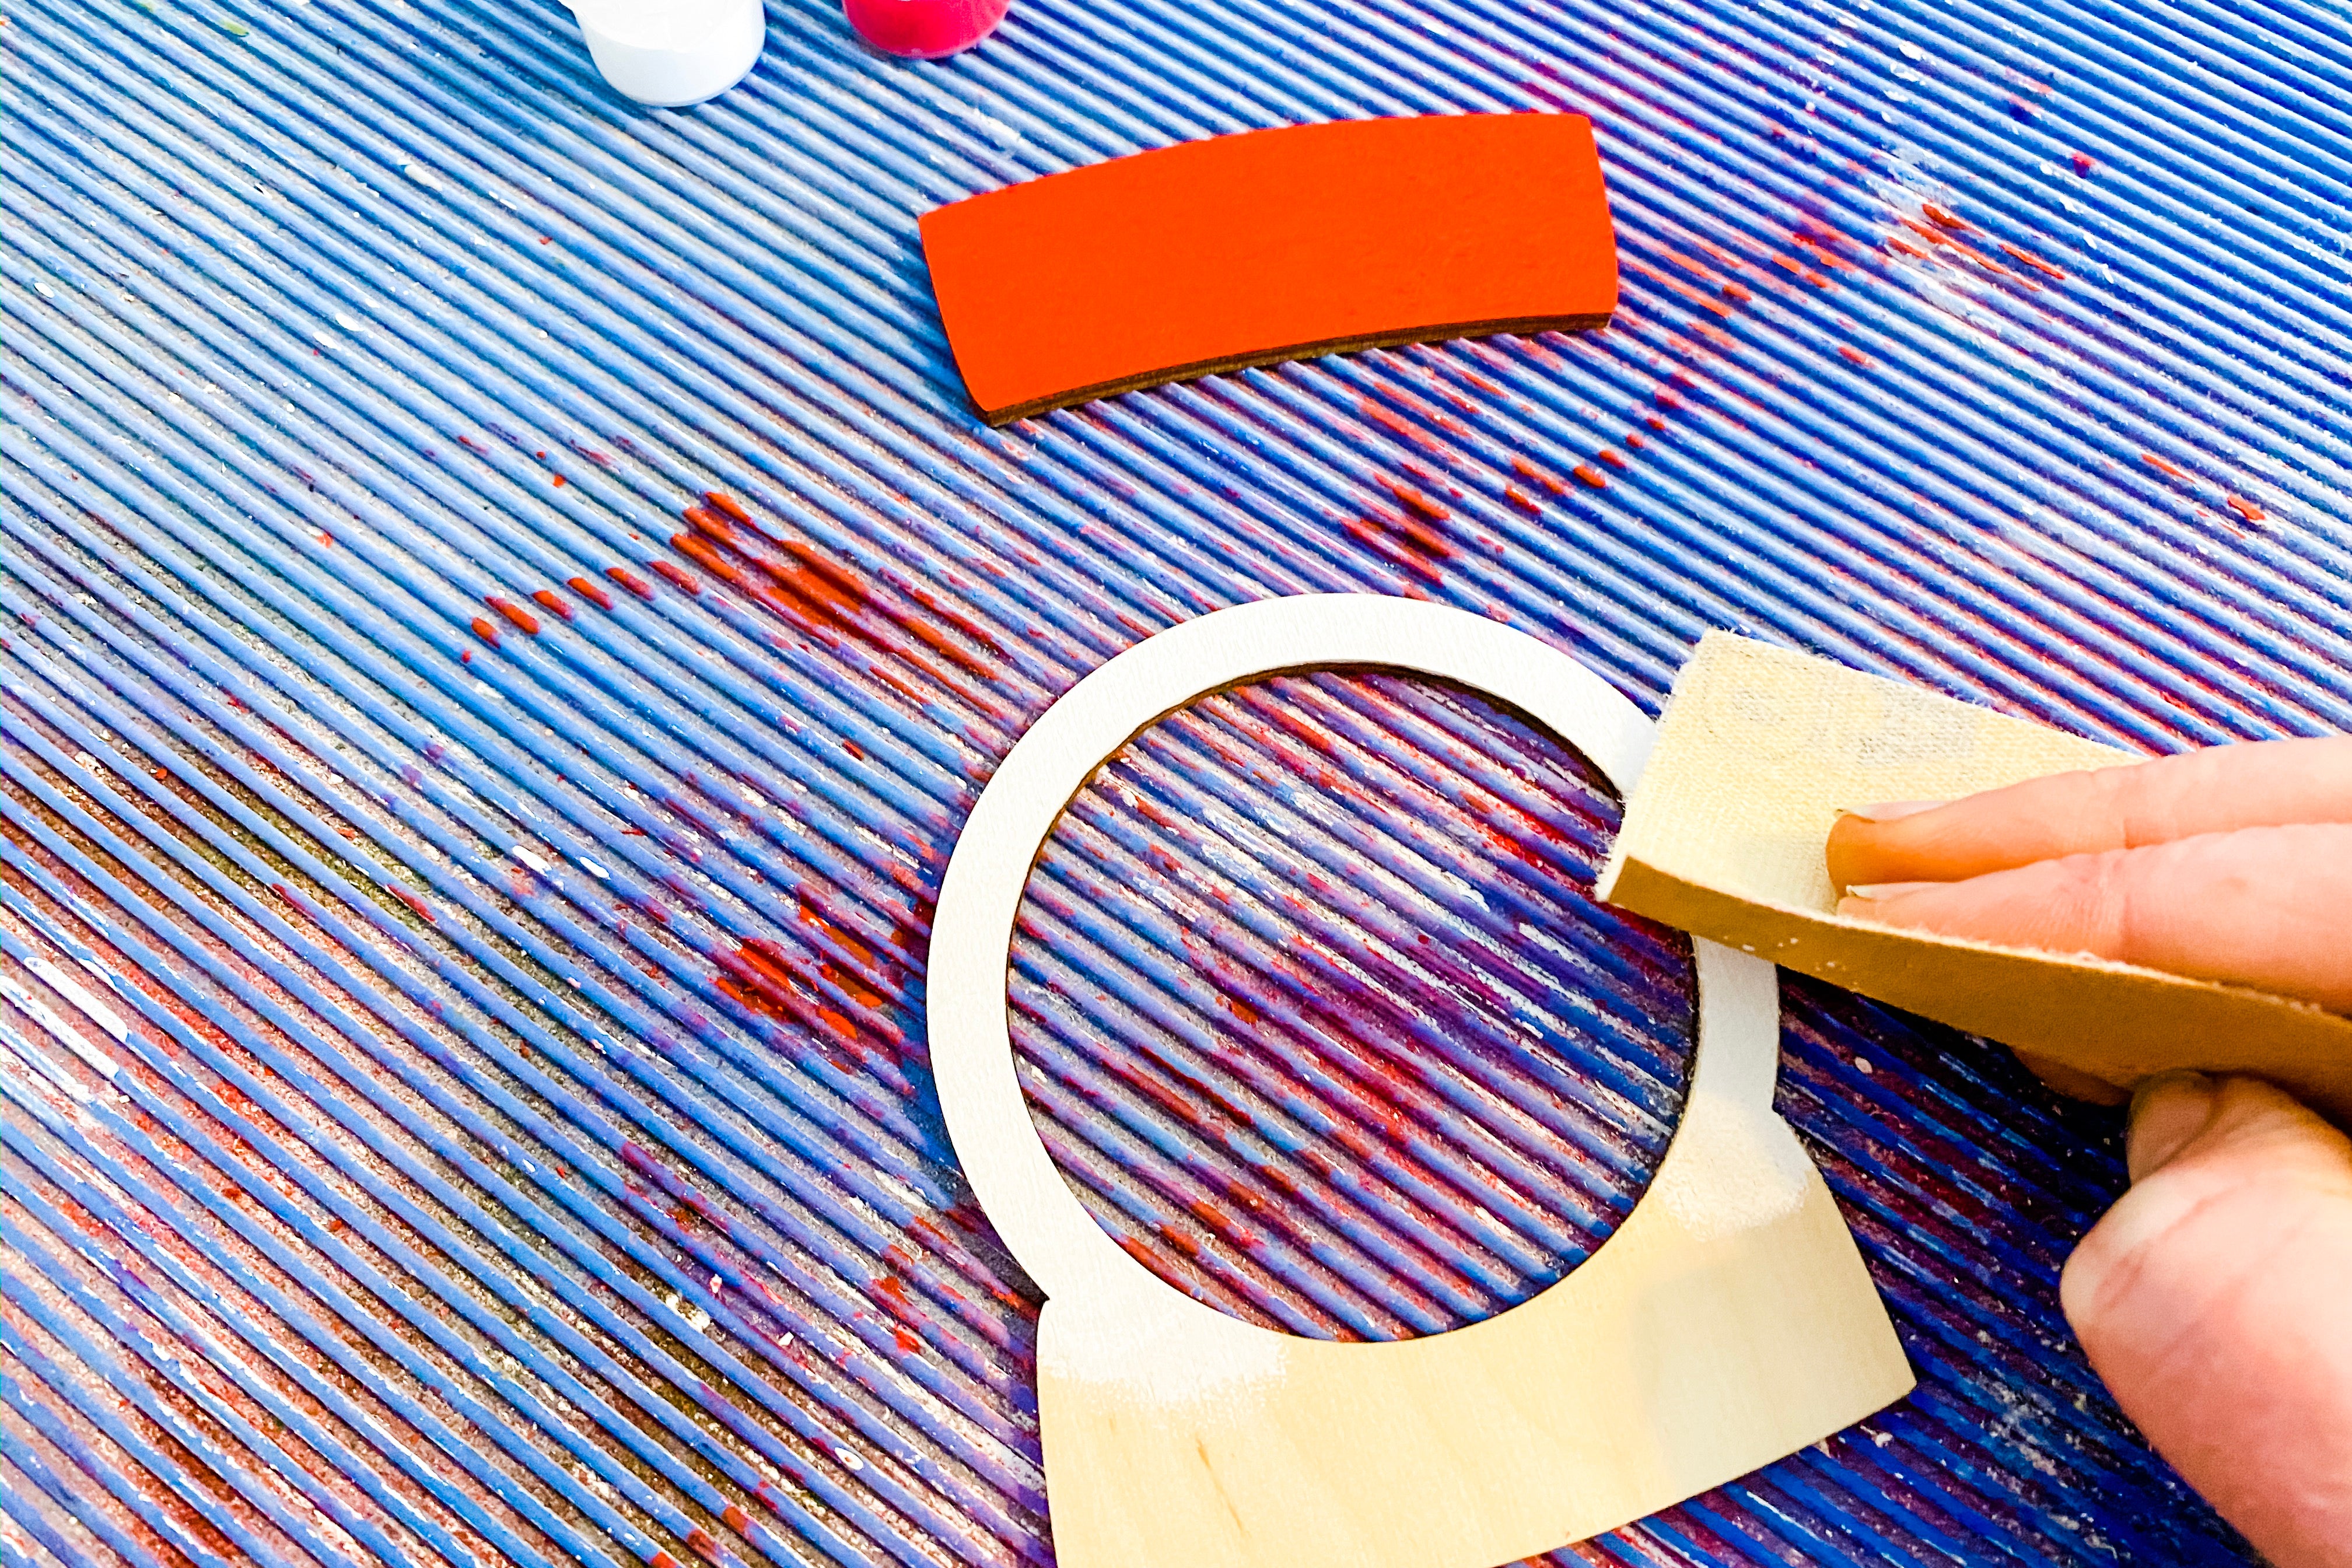
3. After the paint dries lightly sand the painted parts using 220 grit sand paper.

4. Now it is time to assemble.

5. Peel off the adhesive backing on the Back piece. (This has 3 small screw holes). Then stick it to the wooden piece with the hole for the string.

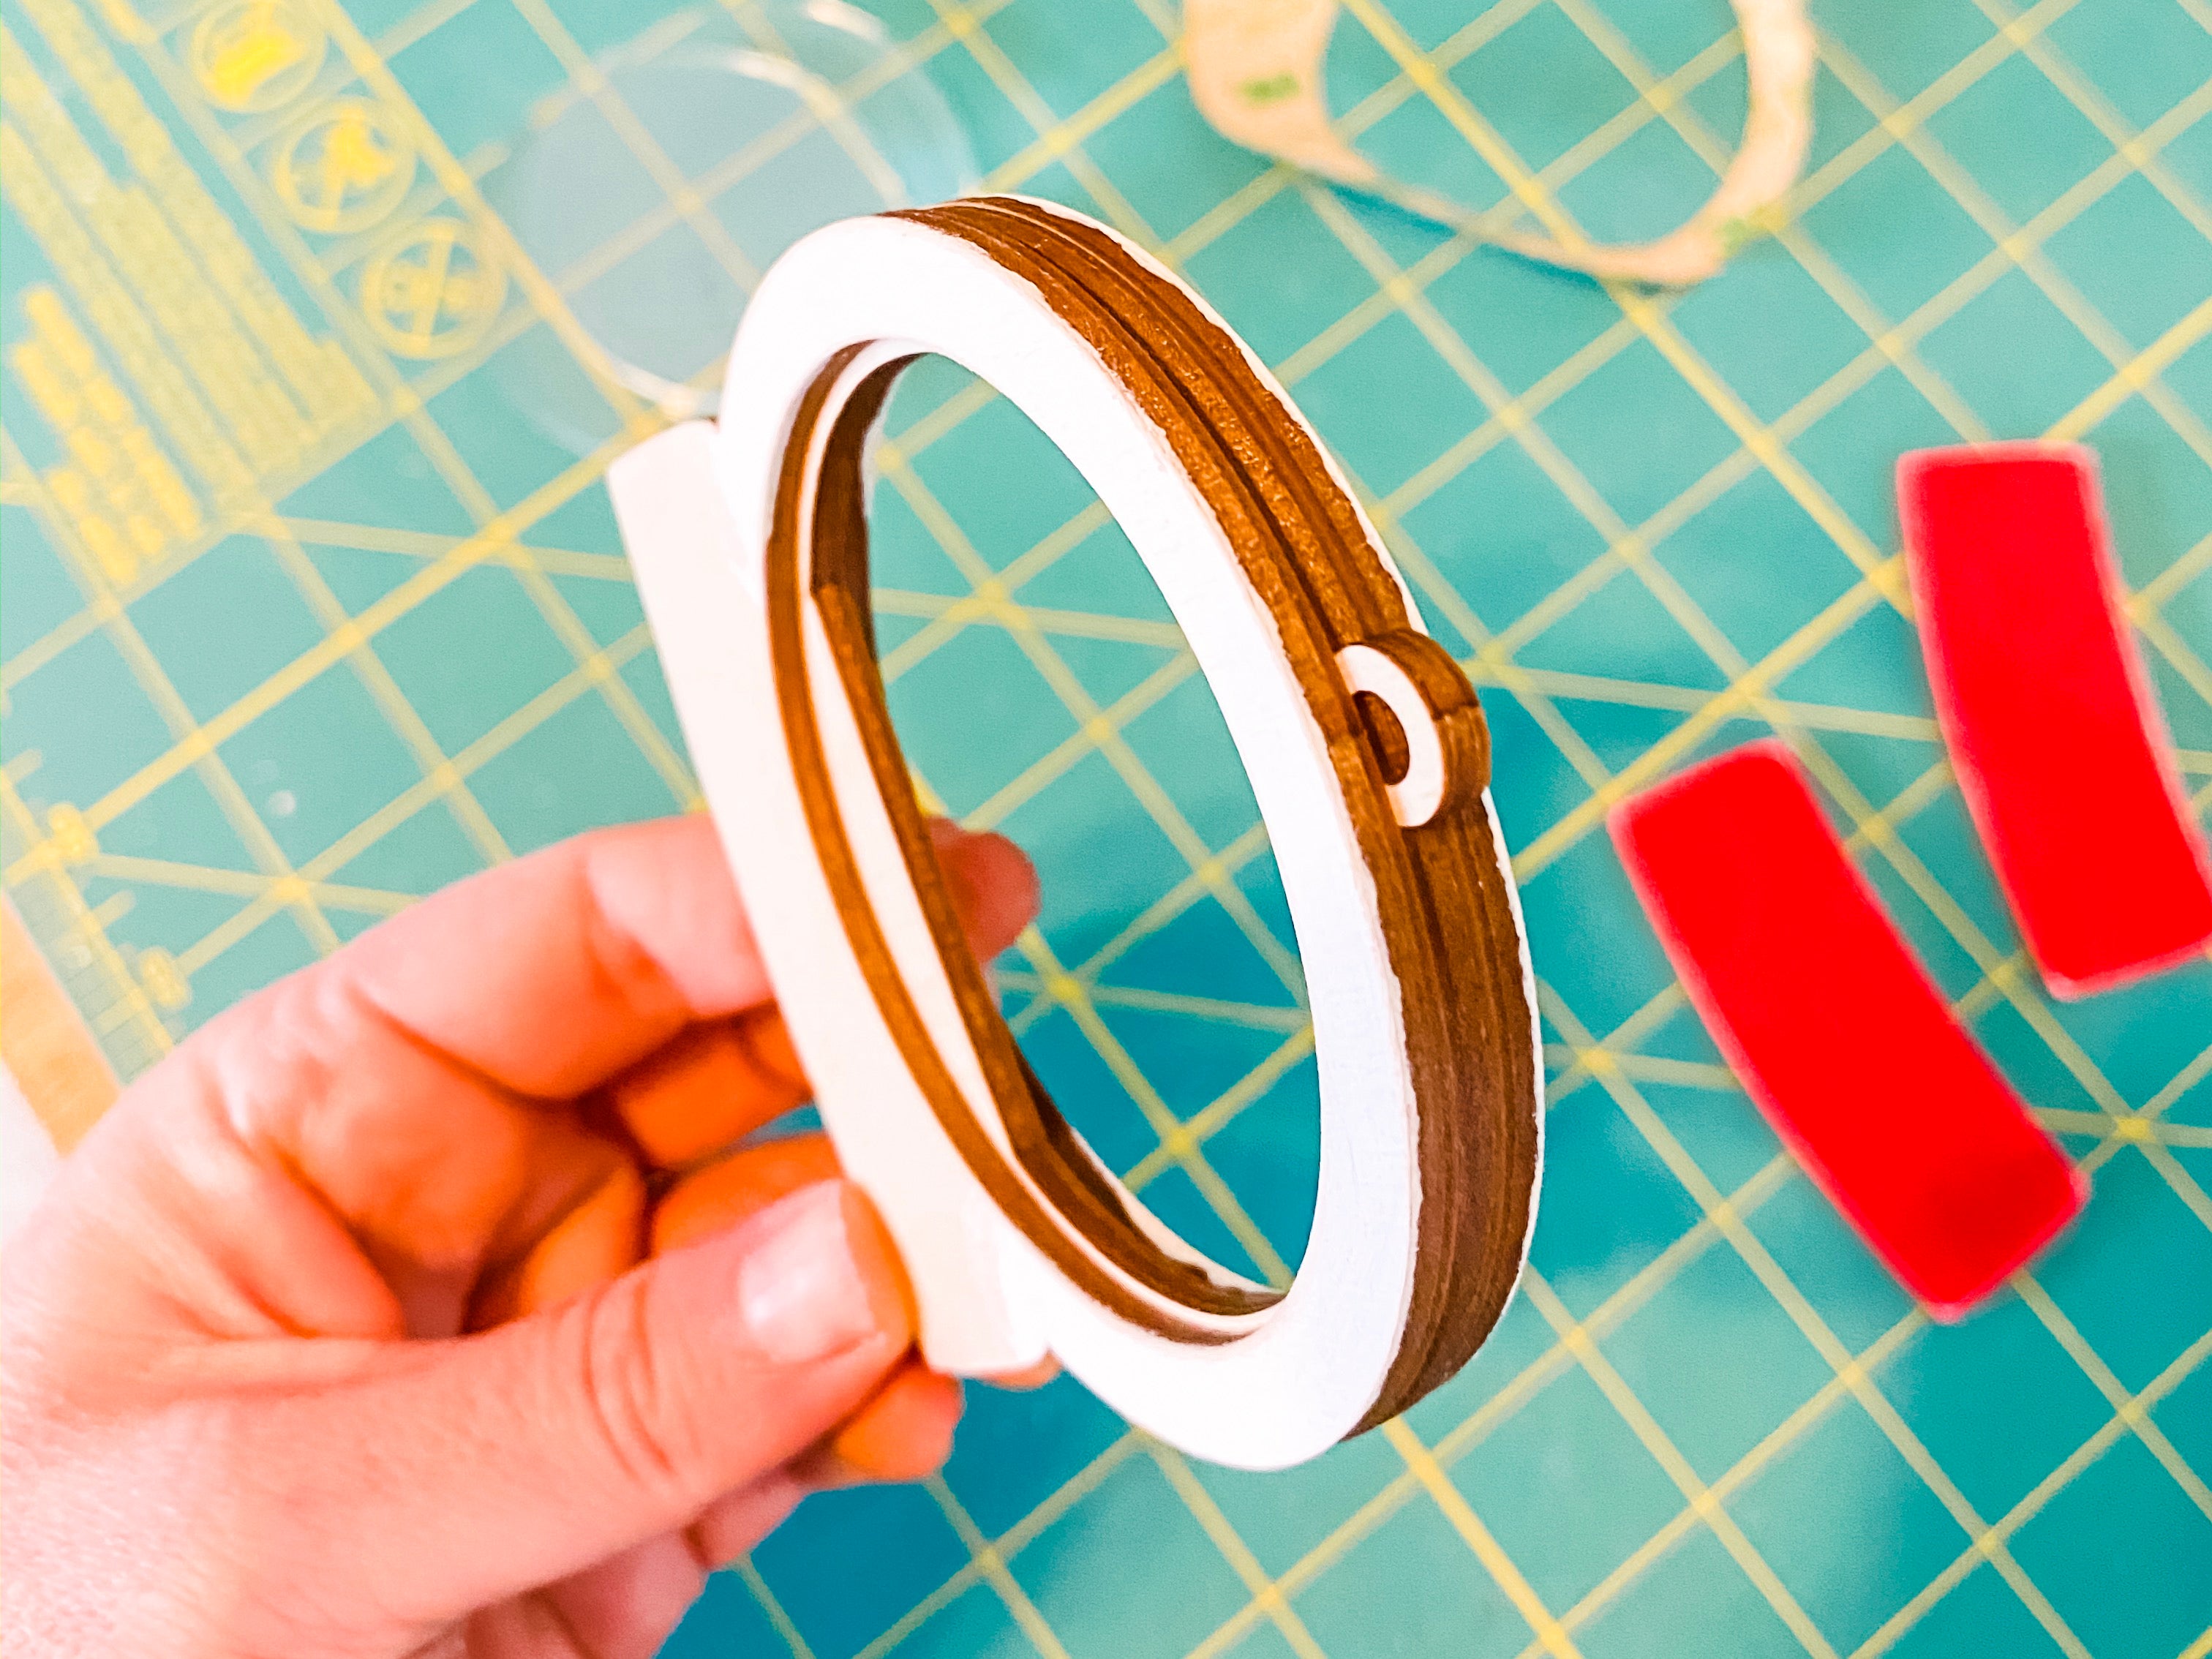

6. Flip the ornament over and stick the front piece on (this is the one I painted white).
This will sandwich the piece with the hole for the string.
Next, drop in the acrylic and stick the red painted piece in place. This red piece will hold the acrylic in place.


7. Next, you will take your photo and trace around the semi circle onto your photo.
Then cut around the trace on the photo. Once cut stick the photo on the semi circle by removing the adhesive tape backing.

8. Now, add a bit of fine faux snow and place the photo into place.


9. Then, take a screw driver and screw the photo buttons into the pilot holes.
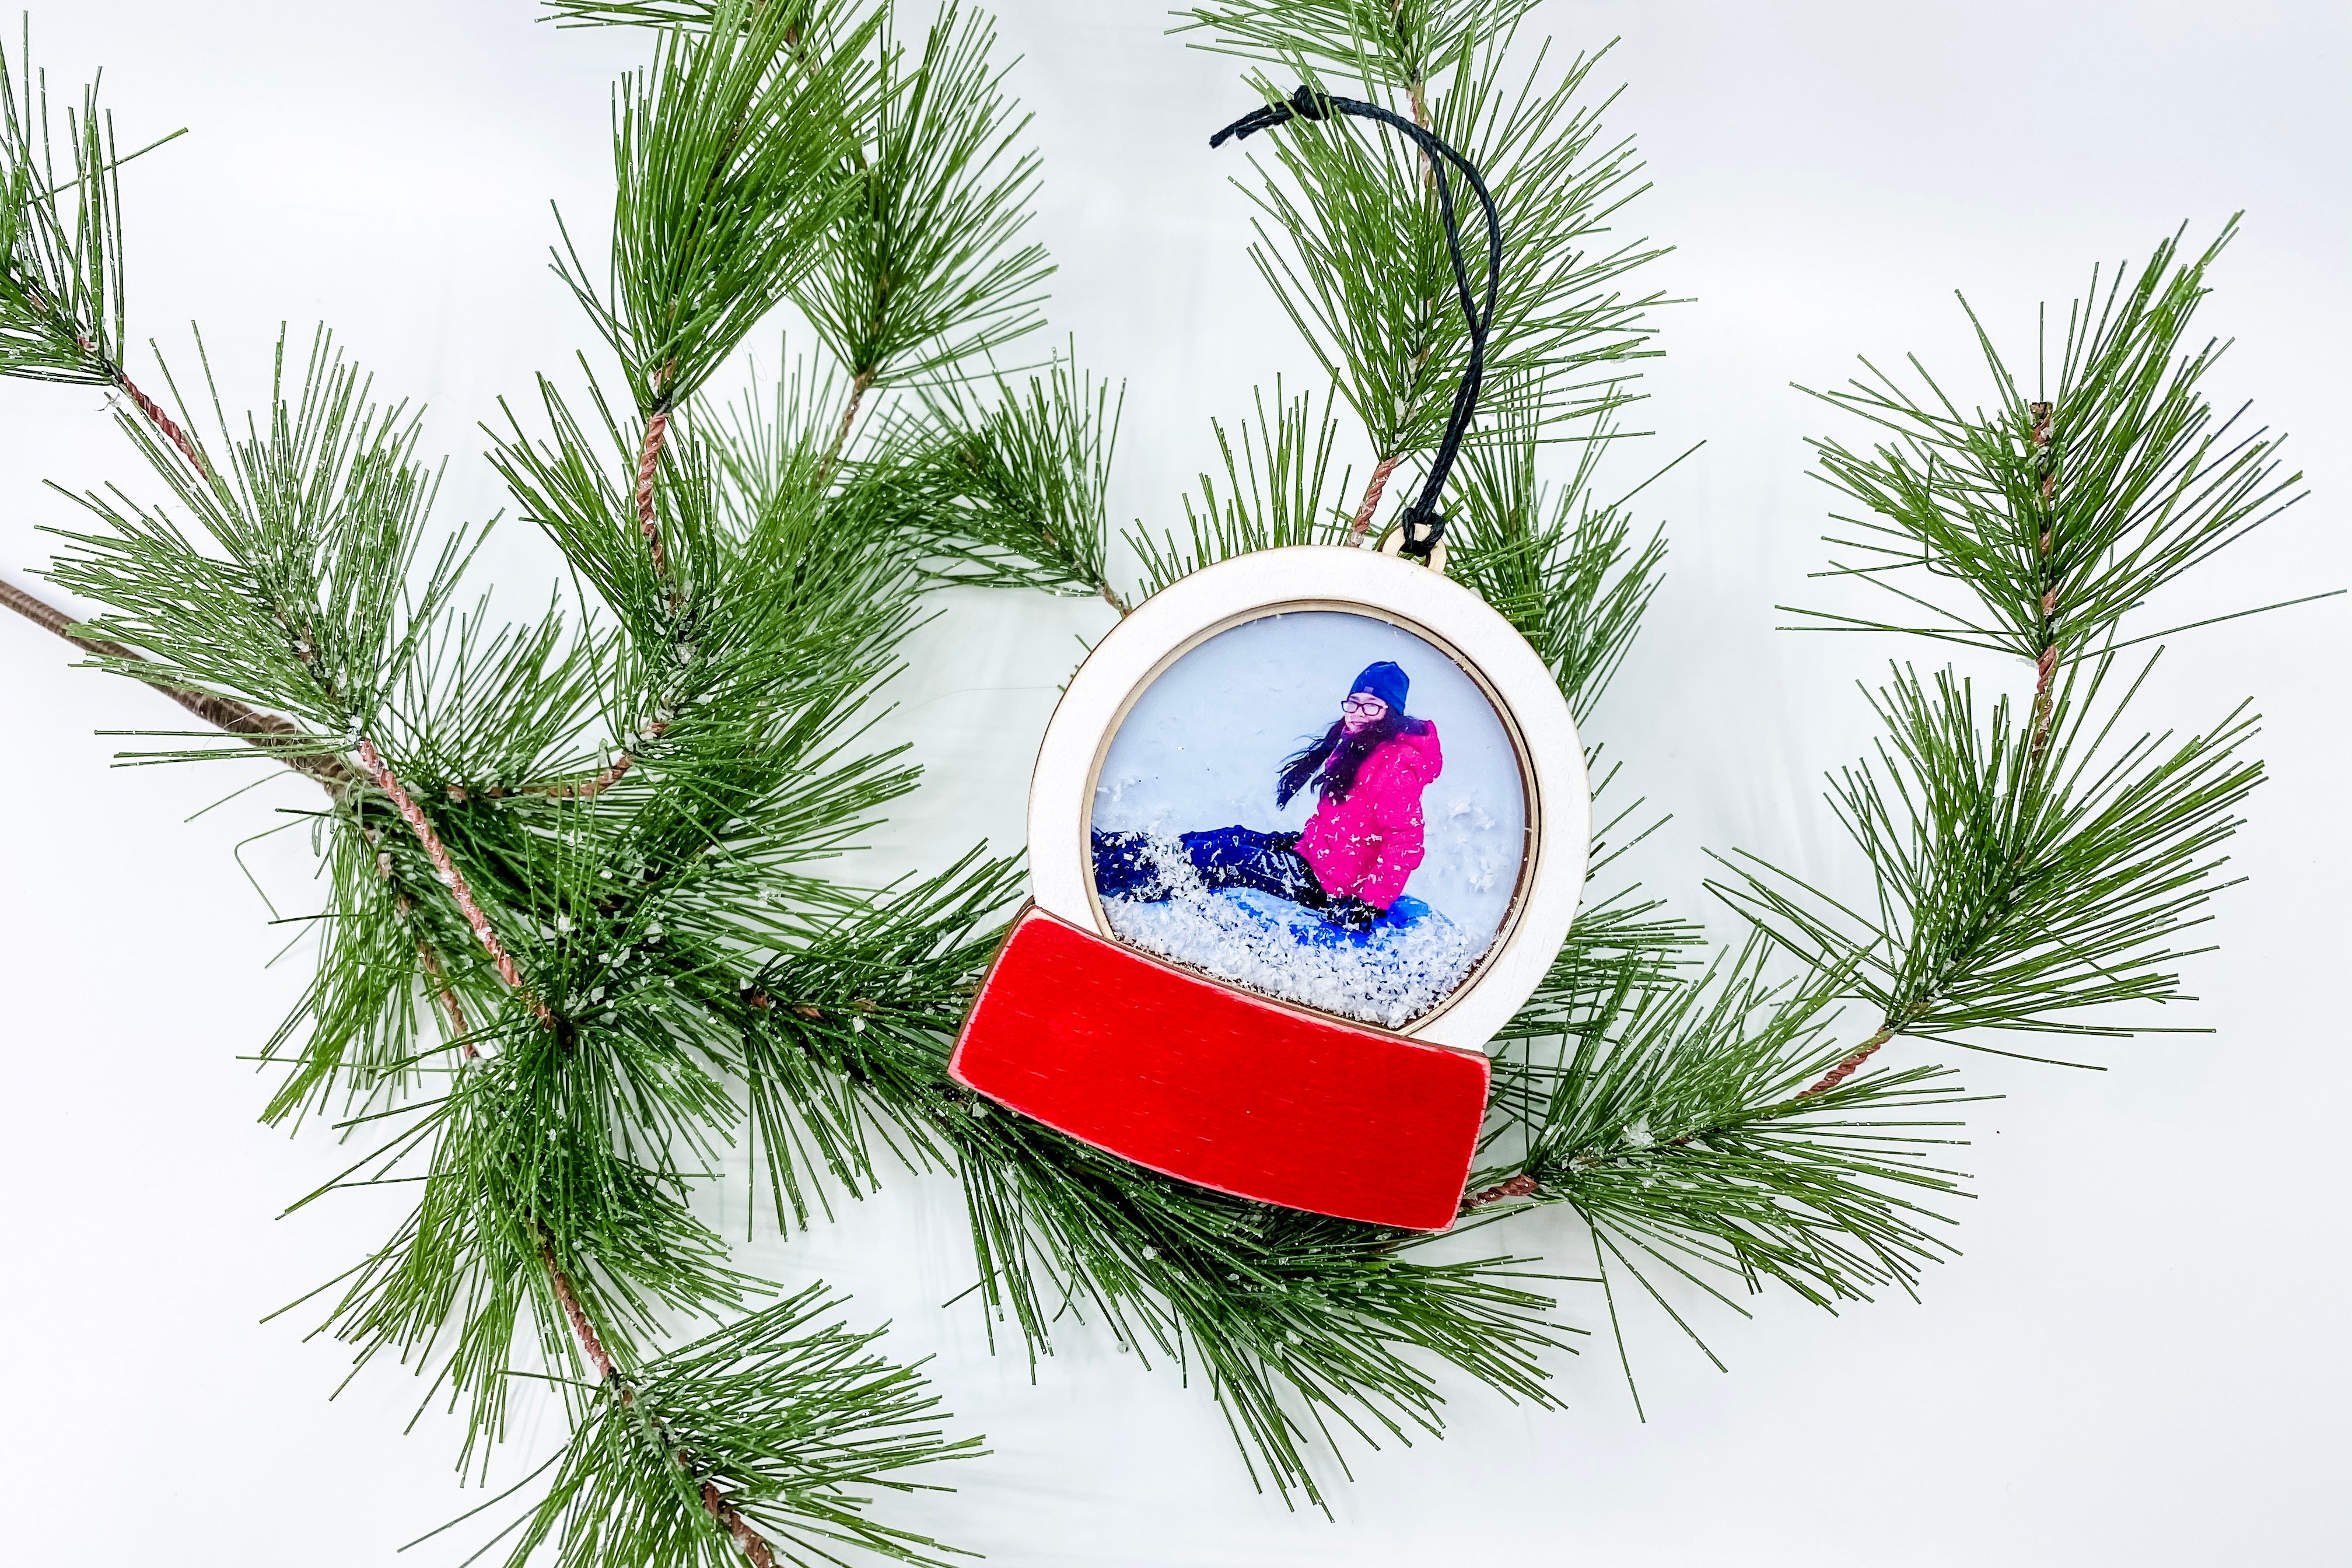
10. Finish it off with a string and you are done!
You made it, now time to put your favorite photo in it and hang it on your Christmas tree.
Tag me on IG with your creation @kitaleigh.made and/or use the hashtag #makeitwithKitaleigh! I just cannot wait to see what you create!