Don't have time to read this now, pin it for later!
This blog post includes affiliate links. What does this mean? It means you will pay no more but I will get a commission for the referral.
Hello Friends! Are you ready to make some adorable buffalo plaid cutout ornaments? This post will tell you everything you need to know to make these for your tree.
The things you need for this project are:
You will need the following:
Or (if you have a laser cutter)

1. First, you will gather your supplies. (If you have a Laser cutter, cut out the design).
Tips for cutting on the Glowforge:

2. Start out by grabbing the large squre with the 3m tape on it and remove the tape to reveal the sticky back.

3. Next, layer the two squares that nest inside each other on top of the sticky backed square.

4. Then, take the reed and slightly dampen them, this will allow them to be a bit more bendable. Next, take 3 of the pieces of reed and stick them in one side of the slot spacing them slightly apart.
Note: The kit includes 9 and only need 6 for the project, the extra 3 are just in case you need them.

5. Now fold the 3 pieces of reed and stick them in the slot on the opposite side of the square.

6. Now adhere them with a bit of hot glue. (all six points where the reed and the square meet)

7. Then weave the other 3 pieces of reed into the 3 you have stuck to the square.


8. Now adhere them with a bit of hot glue. (5 of the 6 points where the reed and the square meet)
Note: You will want to keep the top center unglued. At this point don't be afraid to squish it down and bend the reed a bit to shape it, if you blow dry it a bit it will dry faster and shape faster.


9. Now it is time to paint. I painted the top square black and the joy red.

10. Now let's make the mini wreath. You will dry brush 12-15 leaves in gold.


11. After they are dry begin hot gluing the leaves around the ring alternating the leaves and mixing in the golden leaves.
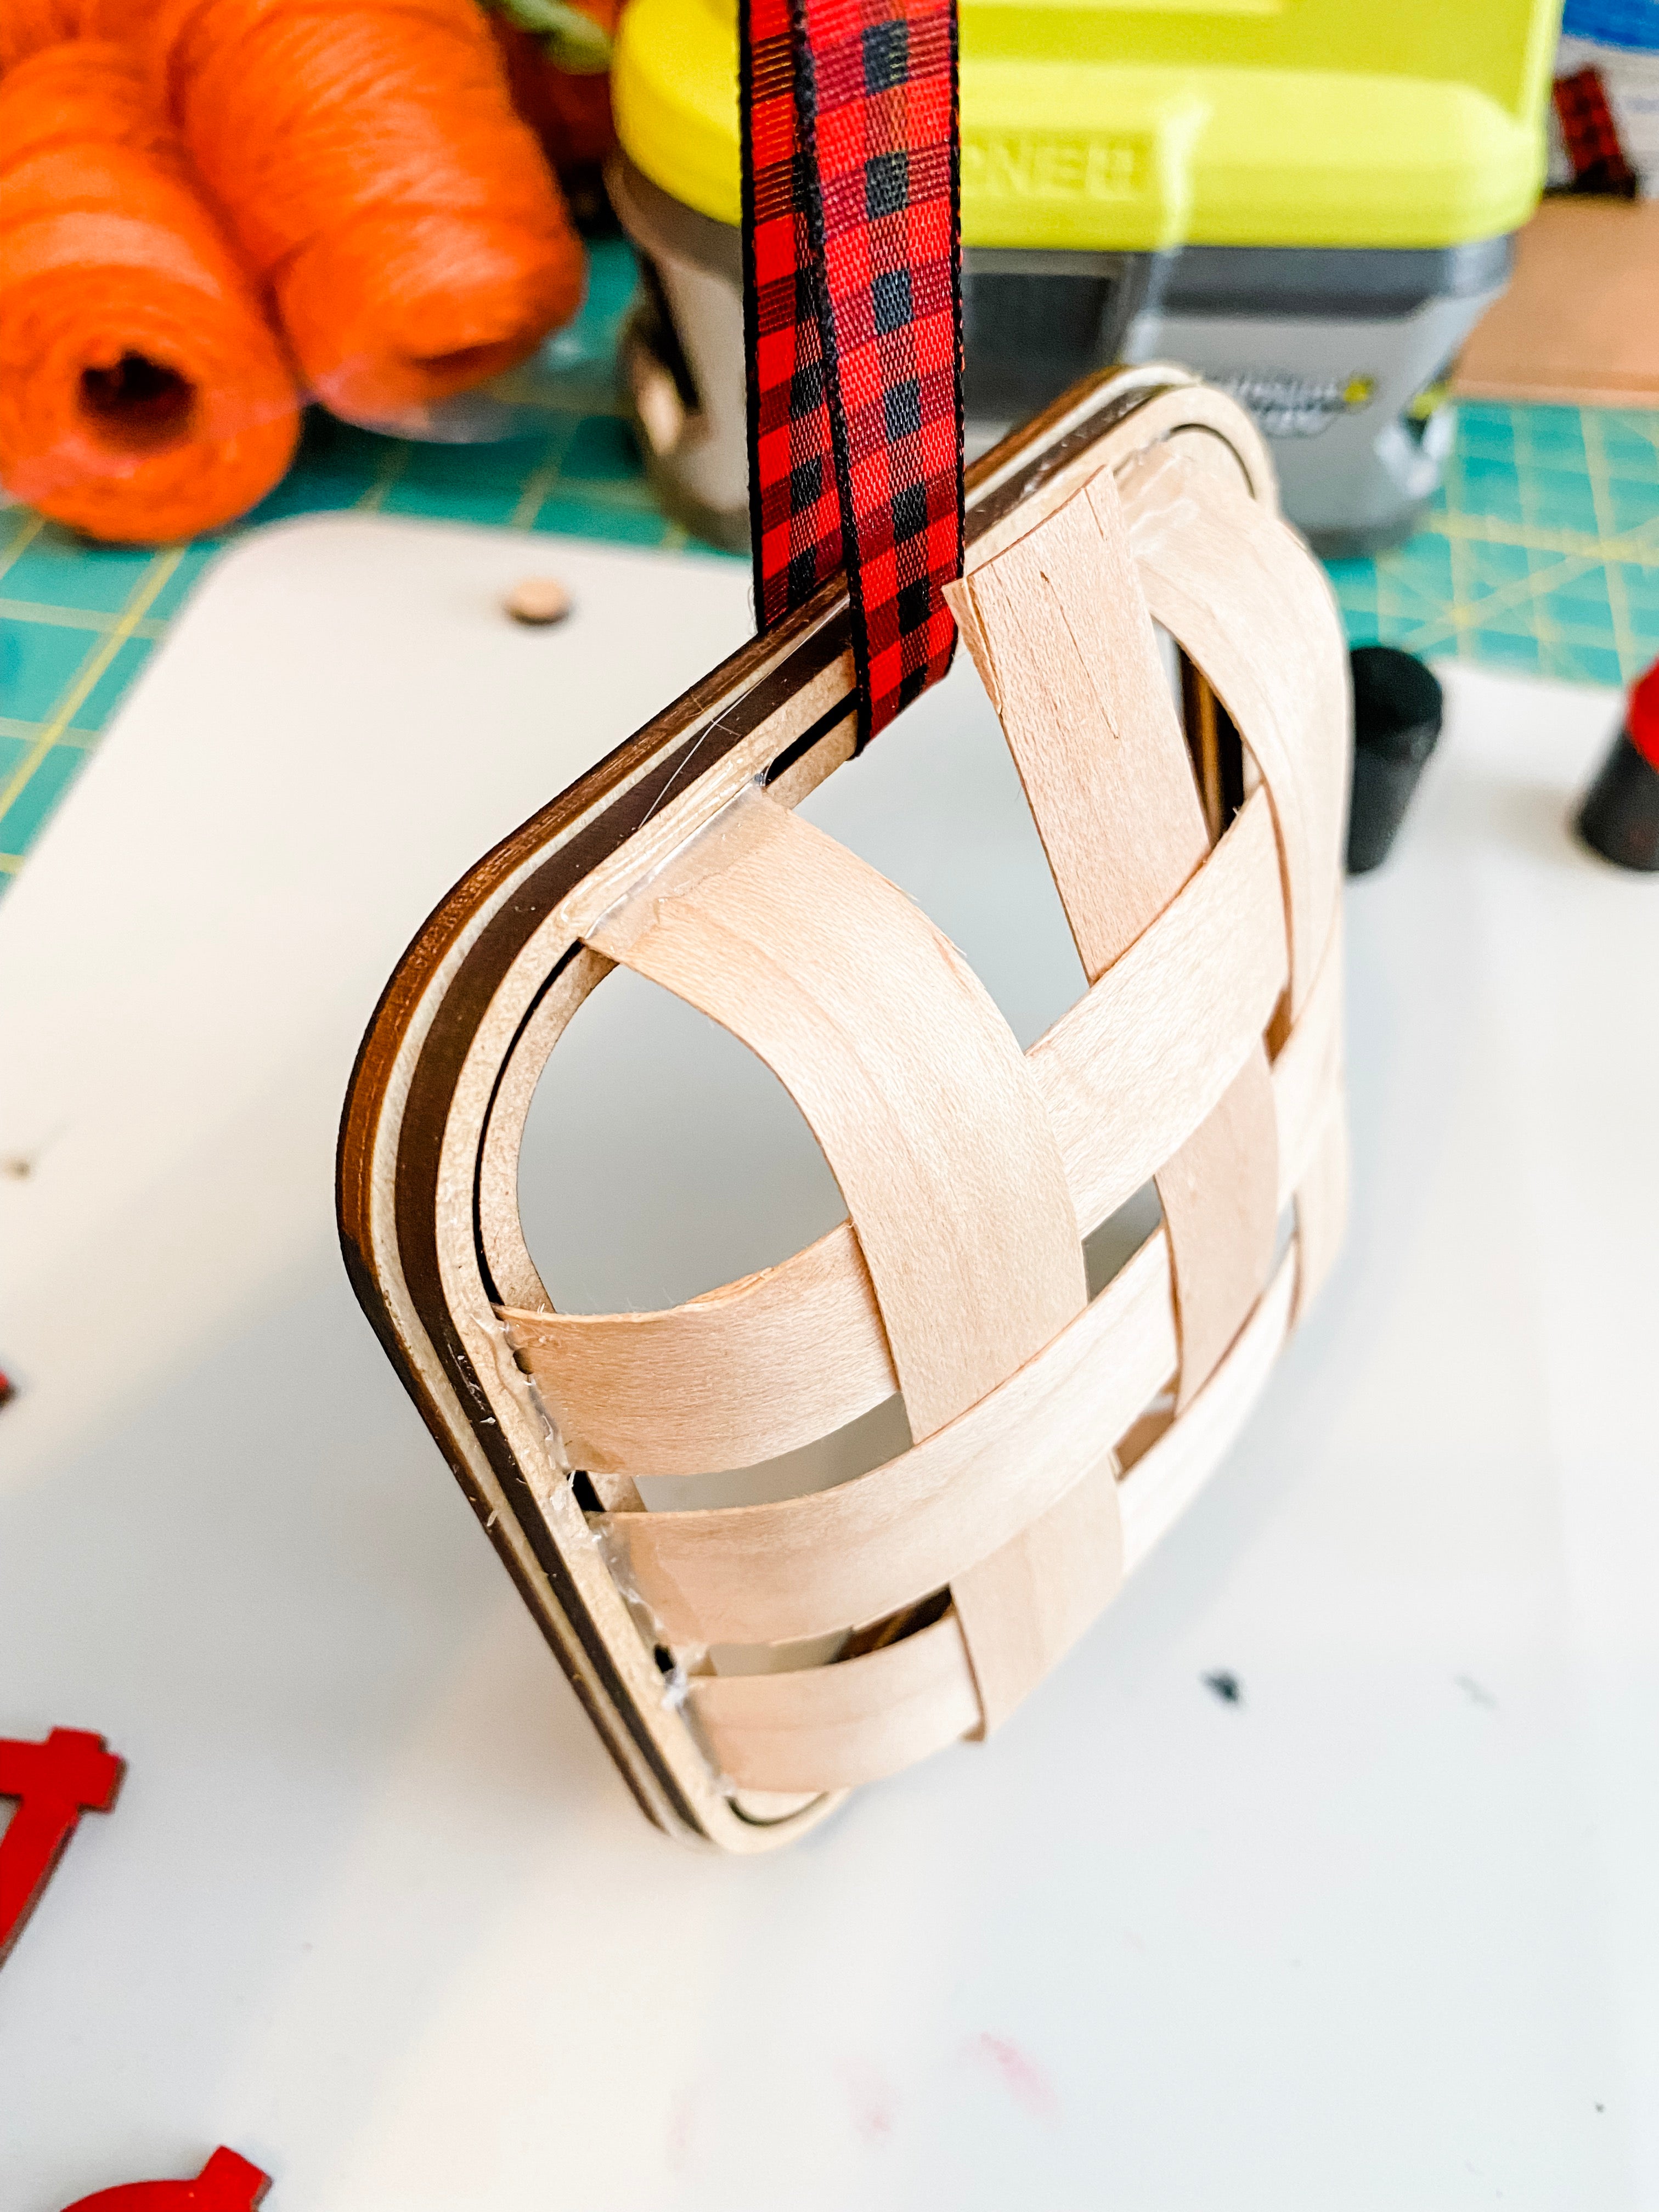

12. Next put the ribbon around the top of the square and then place the reed in the slot. This will place the ribbon in the slot as well.

13. Then, Place some hot glue on the ribbon and reed to secure it.
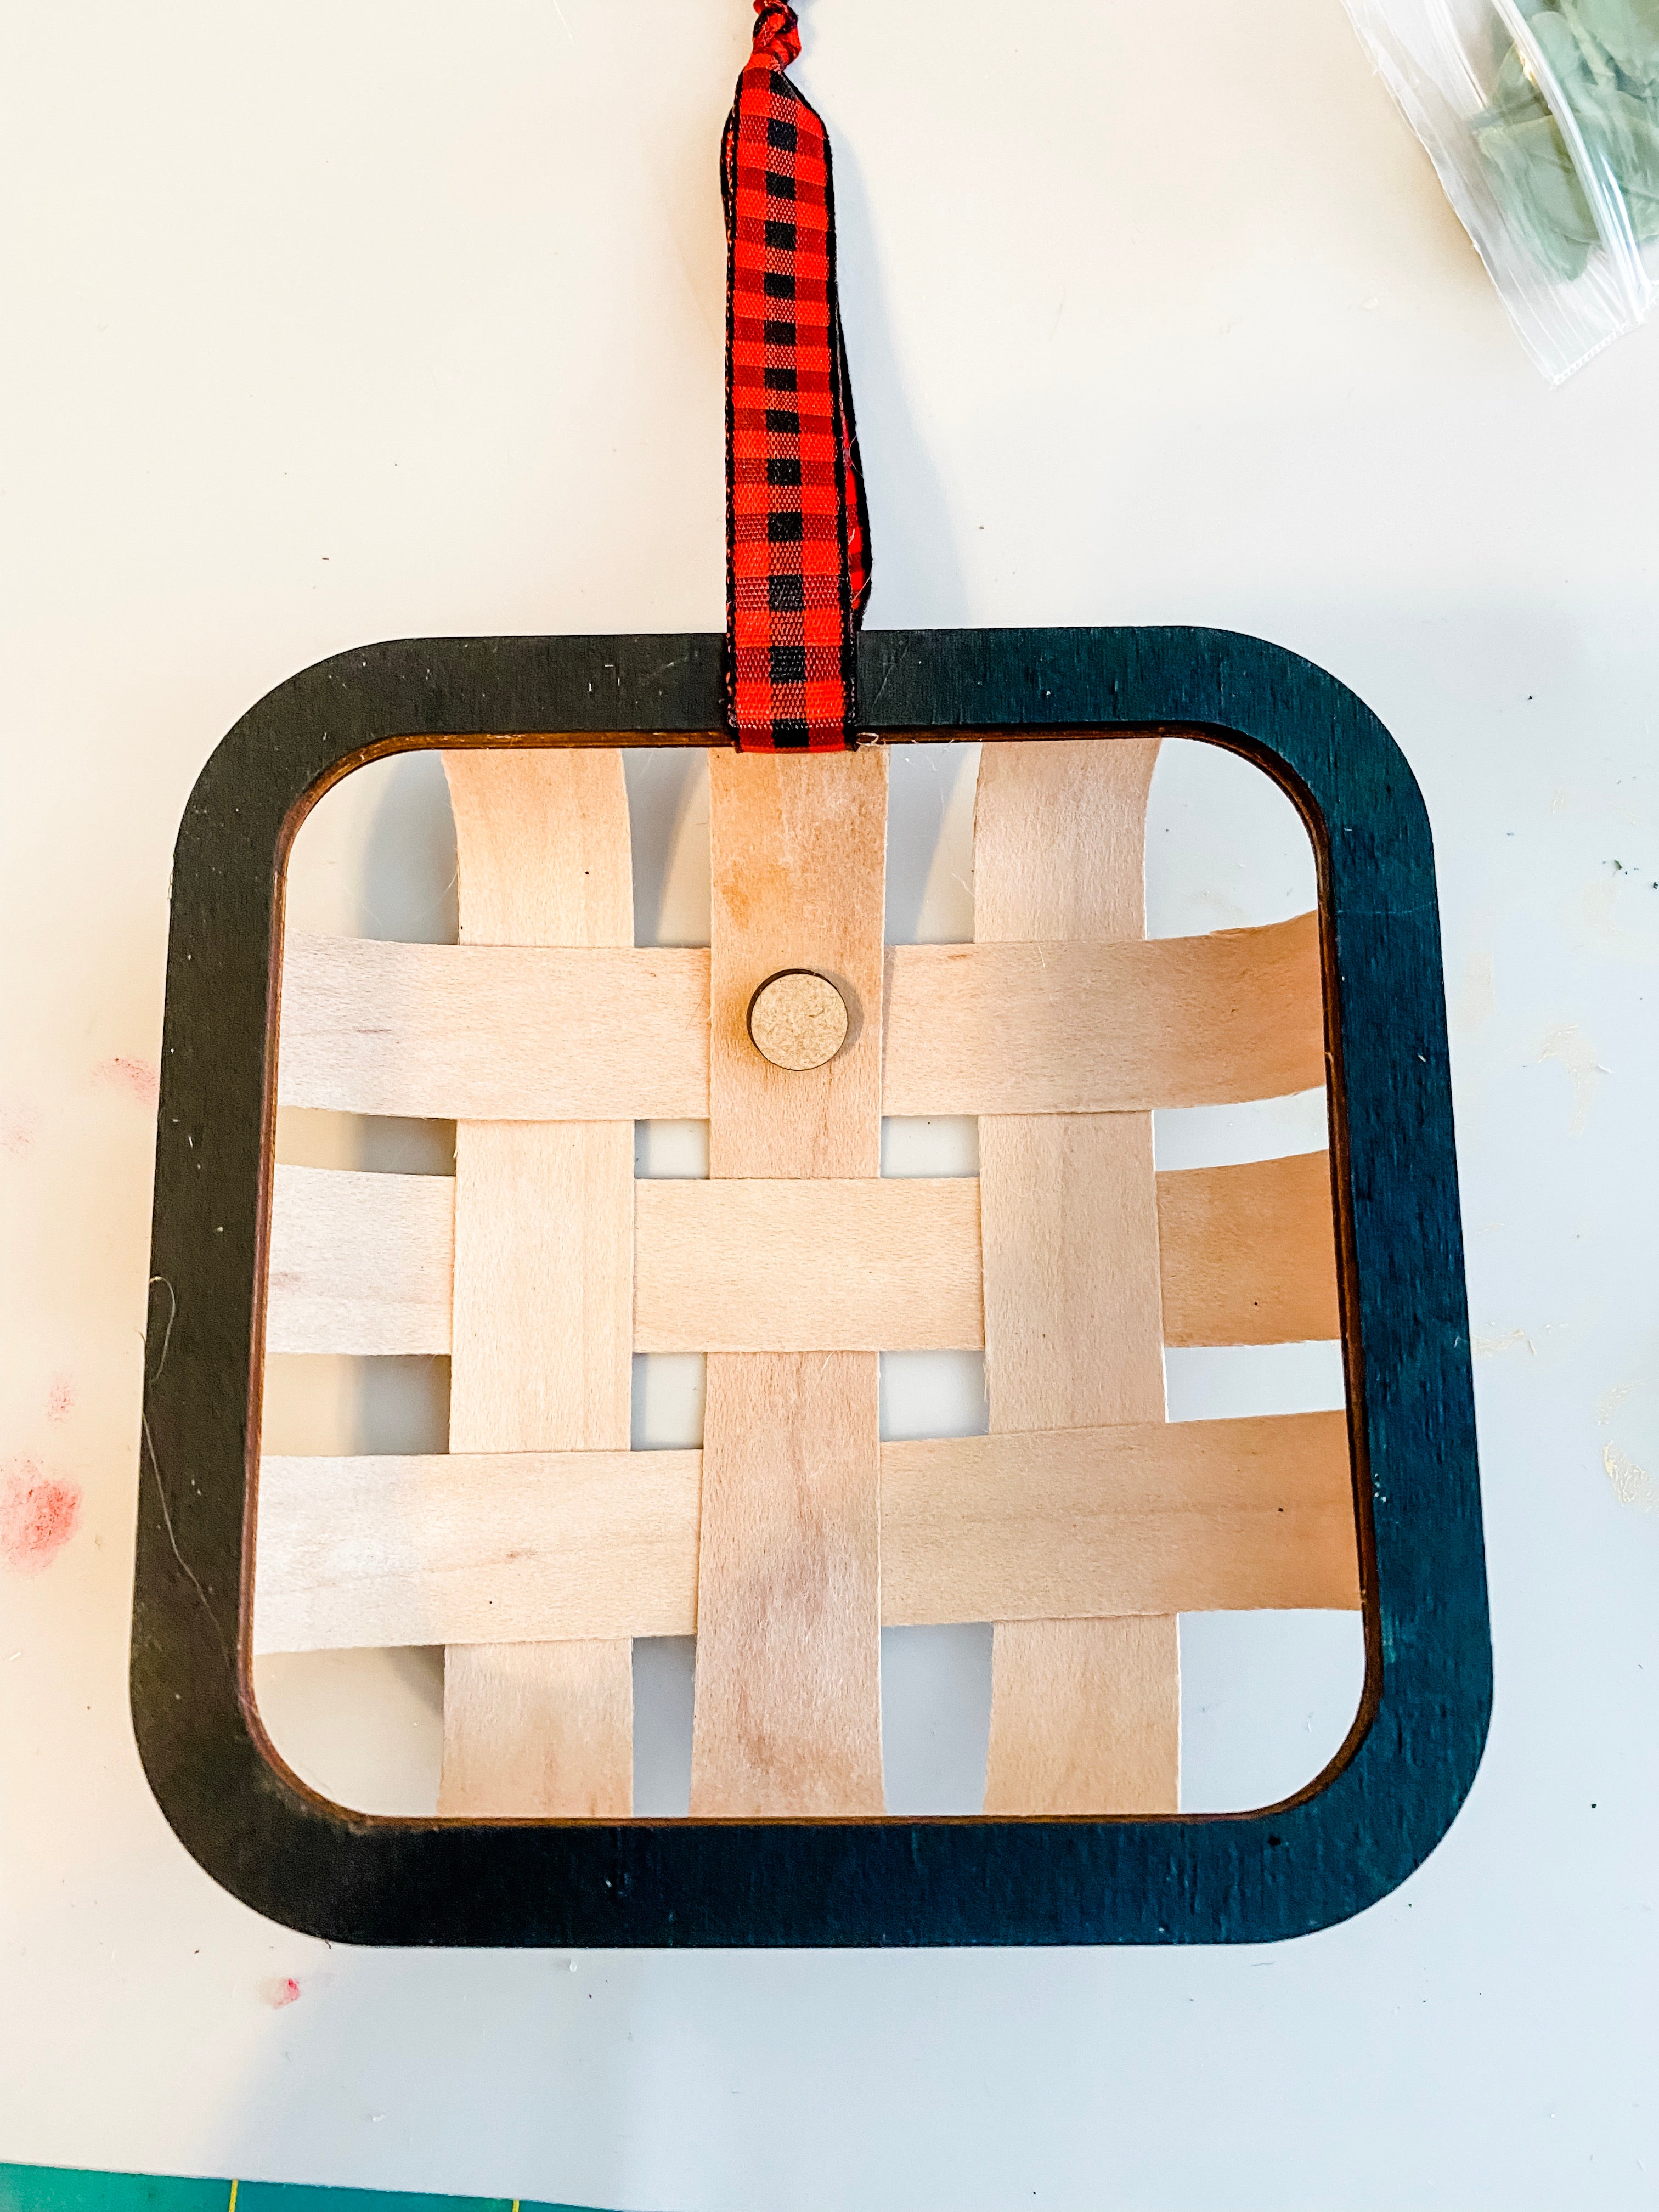

14. Now take the tiny circle and hot glue it to the inside of the wreath and then glue the wreath on top of it.

15. Now take the painted JOY and glue it to the top of the basket.
You made it, now show that ornament proudly on your Christmas tree!
Tag me on IG with your creation @kitaleigh.made and/or use the hashtag #makeitwithKitaleigh! I just cannot wait to see what you create!


Related Posts
Creative Ways to Letter 'G'
10 Playful Fonts for Kids