Don't have time to read this now, pin it for later!
Hey Friends! If you are reading this you are ready to laser all the things but you first need to know what to get! Well below is a list of my must-have supplies for laser cutting and engraving!
This blog post includes affiliate links. What does this mean? It means you will pay no more but I will get a small percentage for the referral.
#1 Laser Cutter
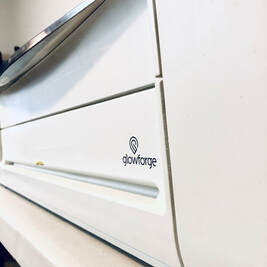
First and foremost you will need a laser engraver/cutter! I have invested in a Glowforge. I find it to be a user friendly and budget friendly machine. You can grab one here and save up to $500!
#2 Cleaning Supplies

It is very important to keep your machine clean from debris. Some of the items that will help you keep it in tip top shape are:
-Vacuum to clean out the laser bed and crumb tray.
-Micro Fiber Cloths to wipe off the laser bed and dust the outer parts of the machine.
-Zeiss Wipes are recommended to clean the cameras, lens, windows and more. The wipes are safe for the laser and will not damage the unit.
-Compressed Air is perfect for getting the small debris off of the delicate places of the unit.
Glowforge has a great blog post on keeping your machine nice a tidy, you can view it here!
#3 Basic Materials and Material Prep
Now that you have your Glowforge and everything to keep it clean. You need the basic materials and material prep items.
-A good 1/8" plywood is from Woodpeckers. This wood comes unmasked and will need to be masked in order to keep it looking great after it has been lasered.
-I find masking it best when using TransferRite 582U wide 12" paper masking.
-In order to get a good adhesion to the board I use a brayer. I find the Speedball Brayer is very durable and 4" wide is perfect for this application.
-When using non-proofgrade materials it is best to know the exact height of your materials. This will ensure the engrave and cut will be set correctly in the Glowforge program. I use a metal caliper to help determine this.
-Also when using non-proof grade materials it is very important to make sure your materials are safe to use in the laser. There are many great posts in the Glowforge Forum to help you determine this.
#4 Press that Glowing Button and Start Lasering!
Now you are ready to laser away!
-I like to use magnets to hold my paper down. I mainly use cardstock to make jigs in order to know where the best place is to place my blank. You will want to make sure the magnets will not be in the line of the laser.
-Bed pins are another amazing thing. They will ensure your wood/material is down flat so you will get a good cut/engrave. You can download the file for free in the Glowforge forums.
#5 Items to finish your Projects
Now you have lasered and are ready to finish up your newest project!
-First you will want to weed all of the masking off of your project. I find a plastic razor blade is the way to go if you want to save your finger nails! Also Gorilla Tape is amazing to get all those small pesky pieces. Just wrap it around your fingers and tap your product.
-I find Sanding blocks really help get the tiny imperfections off of your materials. Such as when there is a spot of wood that didn't cut all the way though or is a bit rough.
-Some other things I love to have on hand when I am stacking wood or assembling my laser items is clamps, woodglue, and super glue gel.
#6 Stay Safe Friends!
Last but not least stay safe friends.
Have a Fire Blanket and Fire Extingisher on hand because accidents happen.
Learn more about Glowforge Safety here.
Let me know in the comments below if you have any must have laser supplies or if you have any questions about mine!