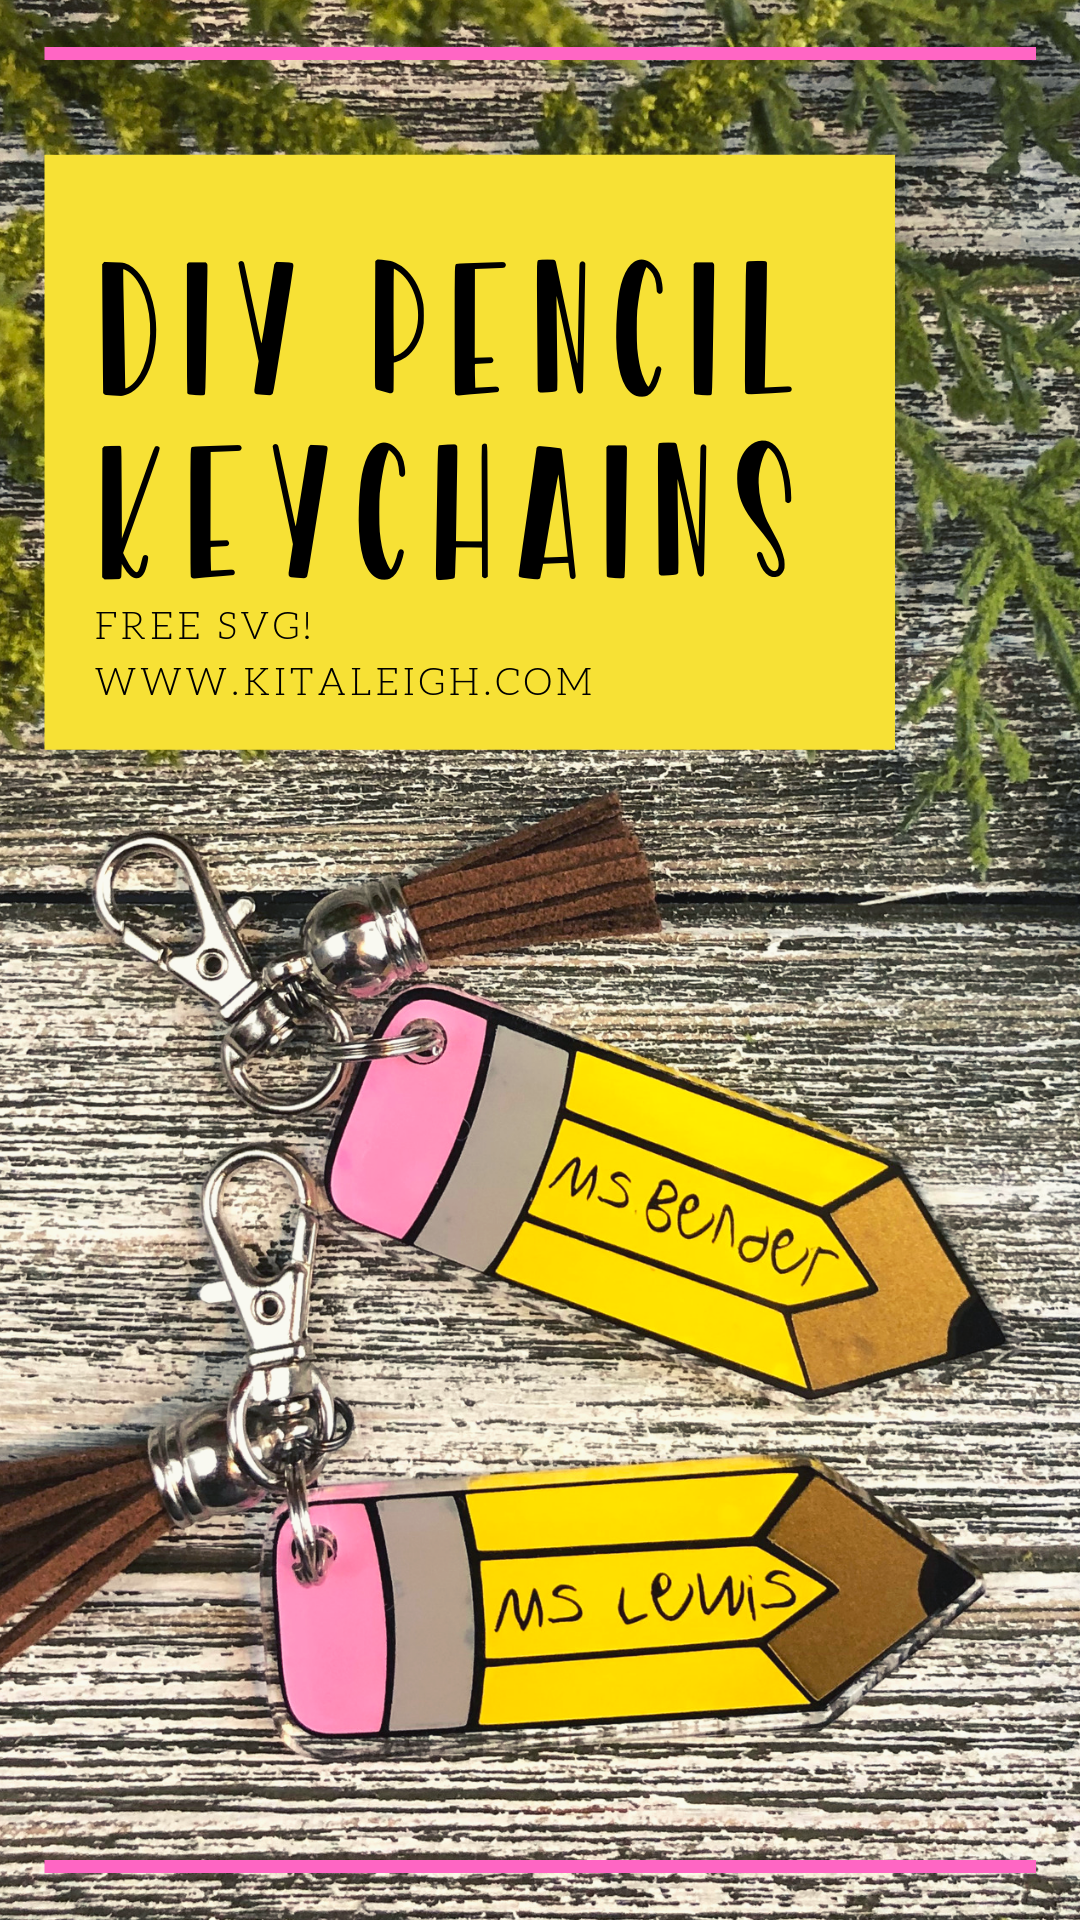
Don't have time to read this now, pin it for later!
This blog post includes affiliate links. What does this mean? It means you will pay no more but I will get a small percentage for the referral.
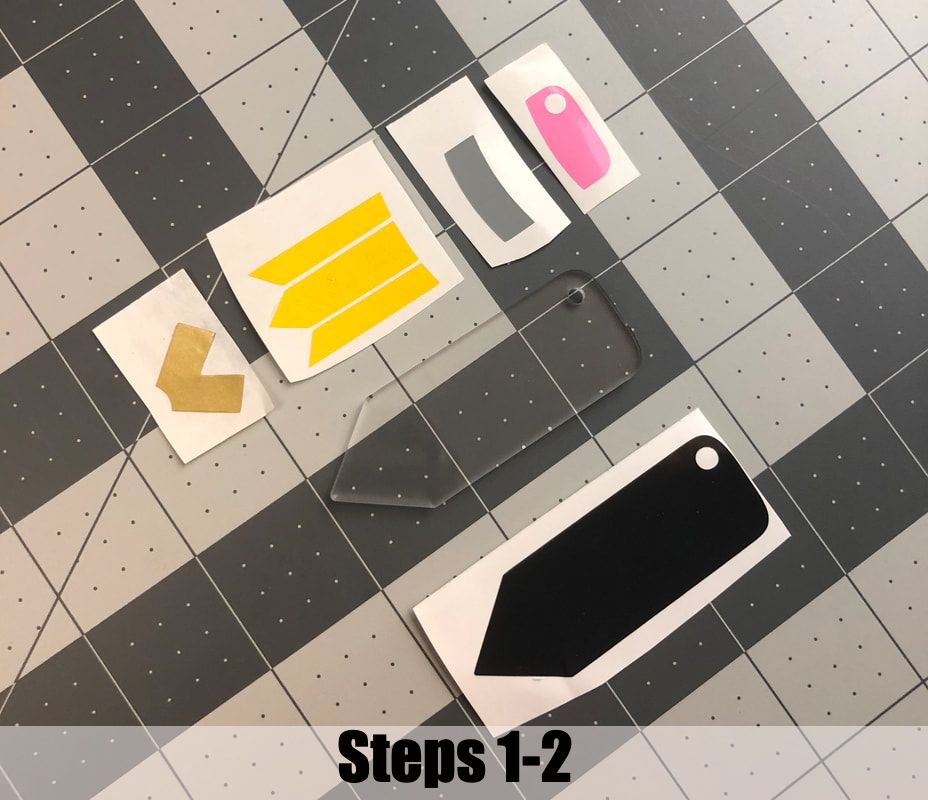
The things you will need for this project are:
- Free SVG Cut File you can get here.
- Pencil Acrylic Blanks, that you can get here.
- Adhesive Vinyl
- Transfer Tape
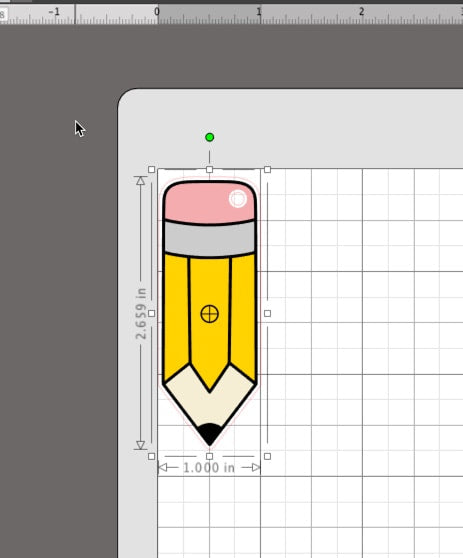
First, download the free svg and pull it into your editing software. I use the designer edition of silhouette studio. Don't have the Designer edition, upgrade here! The Designer upgrade will allow you upload SVGs, this will save you so much headache and frustration.

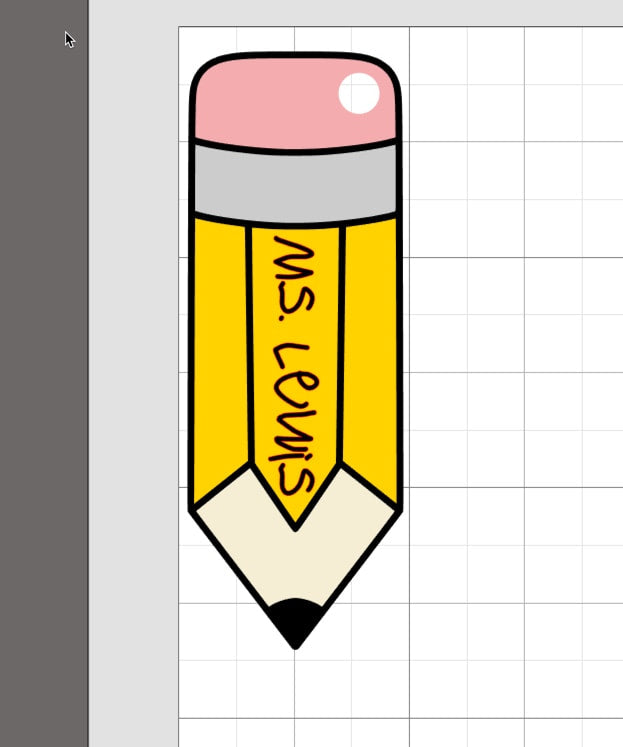
Once the File is uploaded, size it to exactly 1" wide. Then, personalize your pencil if you want. In my specific project I used a font my son wrote out called Dear Santa.

Next:
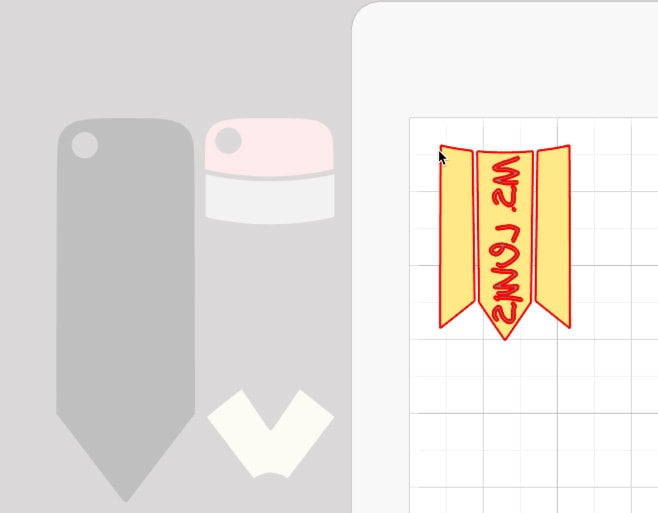
1.Ungroup the design.
2. Delete the red outline (this is the keychain)
3.Rotate the personalization and size it.
4.Group the yellow part and the personalization.
5.Flip the design.
6.Cut each layer separately.
Next (assembly):
1.Weed the different colors. (all minus the personalization.)
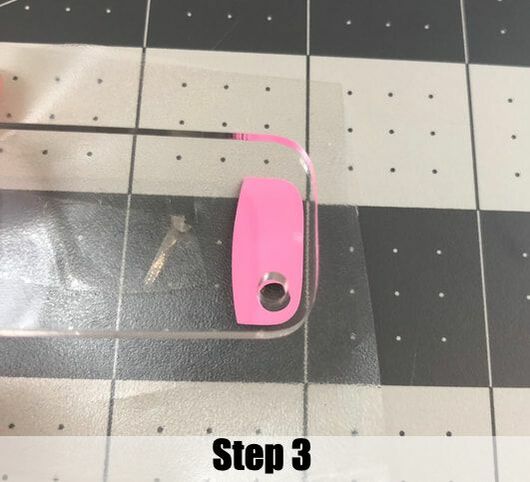
2. Unmask the acrylic Blank.
3. Layer the eraser first (pink layer), then, the silver on to the acrylic blank.
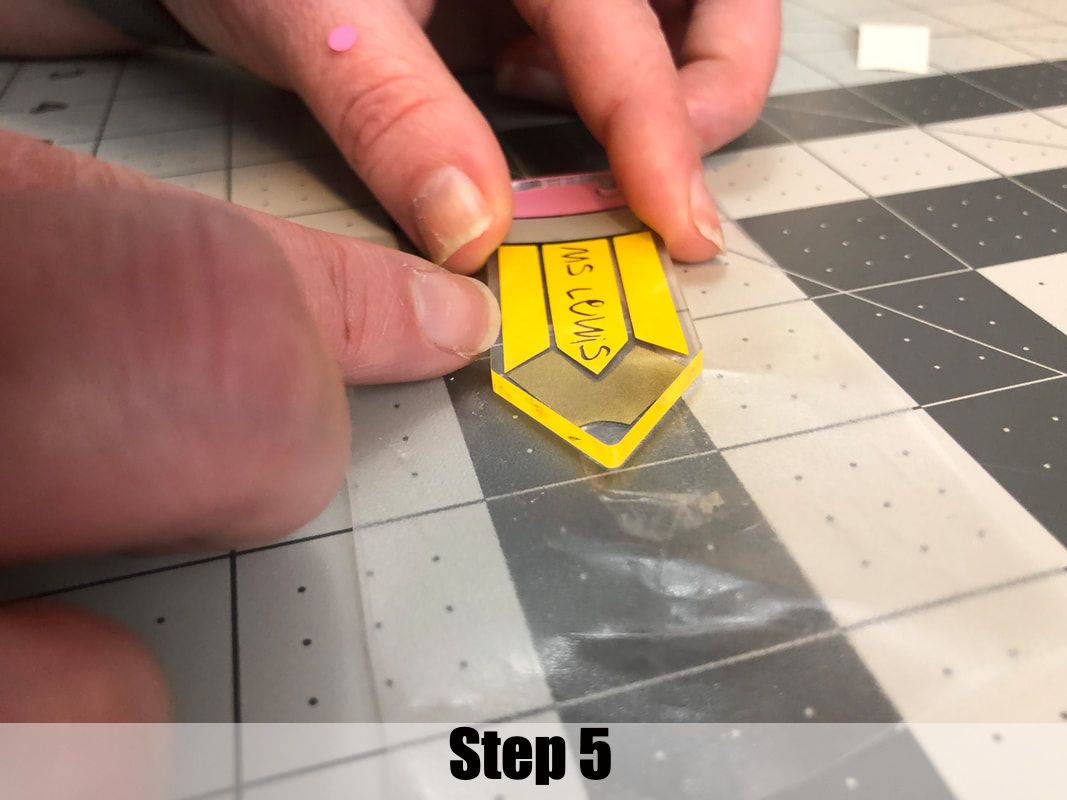
4. Reverse weed the name and then place the yellow layer on the acrylic blank. I absolutely love using tweezers to weed tiny designs!
5. Add the wood layer (gold) to the acrylic blank.
6. Finally add the black layer.
7. Last but not least add the keychain hardware and you are done!
I find that it is easiest to double side tape the transfer tape to the work station and place the blank downward towards the vinyl each time.


Thank you so much for creating with me! Head on over to Instagram and tag me in your final products @kitaleigh.made!